
作者頭像外掛:
外掛名稱:WP User Avatar
外掛下載:https://wordpress.org/plugins/wp-user-avatar/
外掛下載:https://wordpress.org/plugins/wp-user-avatar/
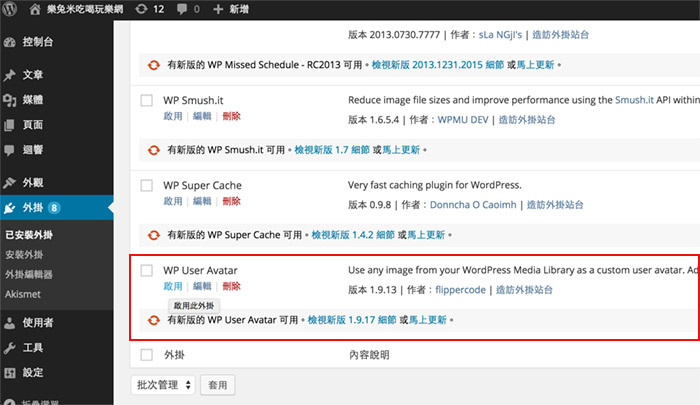
1.安裝WP User Avatar:
Step1
首先,先將WP User Avatar外掛,上傳到外掛目錄,接著再到Wordpress後台將它啟用。
2.functions.php:
<?php //自定作者資訊欄位 function my_new_contactmethods( $contactmethods ) { $contactmethods['twitter'] = 'Twitter'; $contactmethods['facebook'] = 'Facebook'; return $contactmethods; } add_filter('user_contactmethods','my_new_contactmethods',10,1); ?> |
3.single.php:
<!-- 作者頭像 --> <?php echo get_avatar(get_the_author_meta('ID'), 100);?> <!-- 作者網站 --> <?php if ( get_the_author_meta( 'user_url' ) ): ?> <a href="<?php the_author_meta('user_url');?>" title="我的網站" target="_blank"><?php the_author_meta('display_name');?>:</a> <? endif;?> <!-- 作者簡介 --> <?php the_author_meta('description');?> <!-- G+ --> <?php if ( get_the_author_meta( 'google' ) ): ?> <a href="<?php the_author_meta('google');?>?rel=author" title="我的G+">G+</a> <? endif;?> <!-- FB --> <?php if ( get_the_author_meta( 'facebook' ) ): ?> <a href="<?php the_author_meta('facebook');?>" title="我的臉書">Facebook</a> <? endif;?> <!-- Twitter --> <?php if ( get_the_author_meta( 'twitter' ) ): ?> <a href="<?php the_author_meta('twitter');?>" title="我的推特">Twitter</a> <? endif;?> <!-- 作者更多文章 --> <a href="<?php echo get_author_posts_url(get_the_author_meta('ID'));?>" title="更多<?php the_author_meta('display_name');?>的文章">更多文章»</a> |
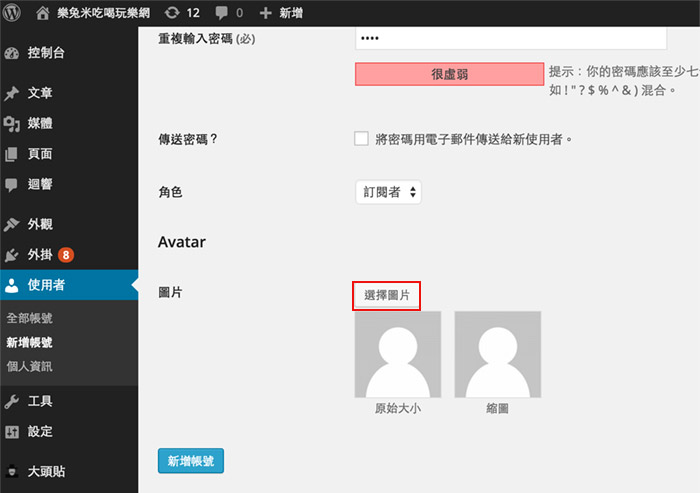
Step2
當啟用完畢後,接者再新增一個新帳號,在帳號下方會看到圖片選項,接著點選擇圖片鈕。
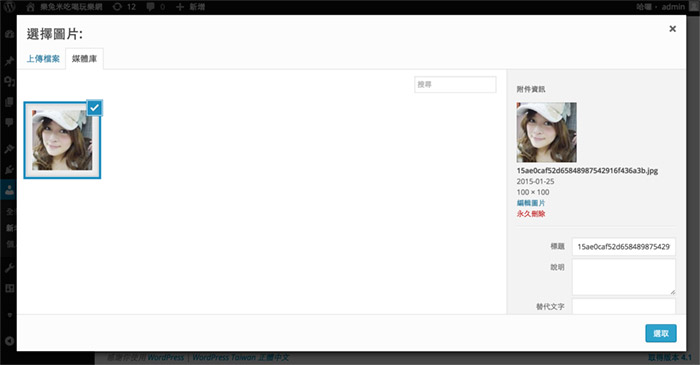
Step3
接著就可將作者頭像,以拖拉的方式上傳。
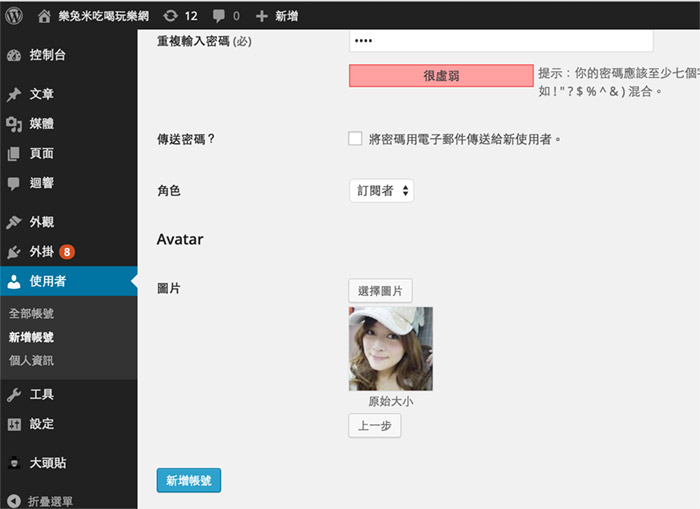
Step4
這樣就新增完畢了。
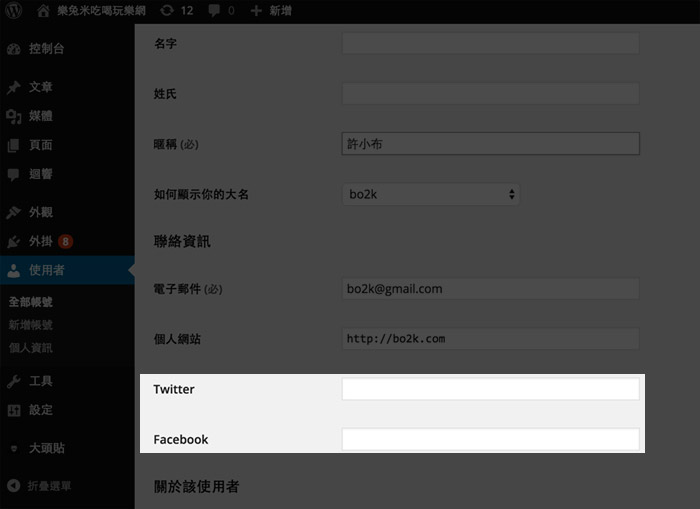
Step5
在編輯使用者帳號的地方,就可再加以新增作者的臉書、G+、推特。
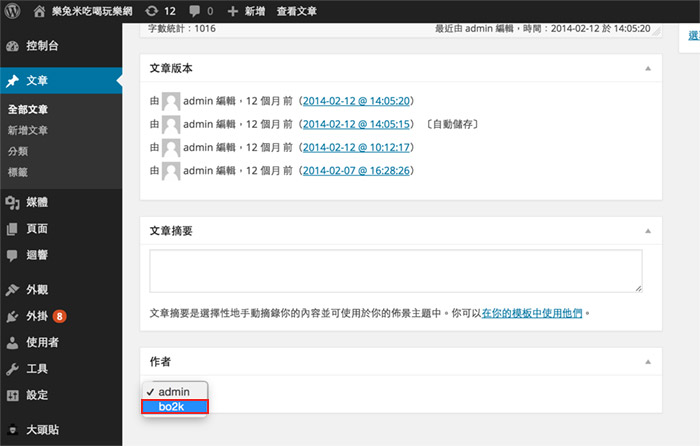
Step6
當之後在新增文章時,在下方選擇作者名稱。
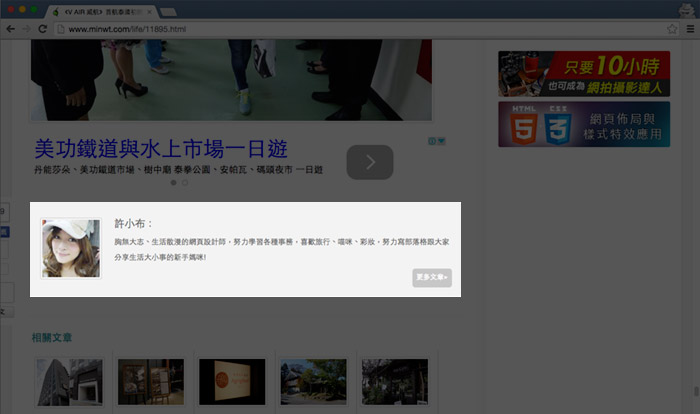
Step7
這樣在文未就會出現作者資訊啦!
[範例下載]